Navigate - Overview of the Student Profile Page
Overview Tab
The first page of the Student Profile you will see is the "Overview" page. From this page we can get a quick overview of the student.
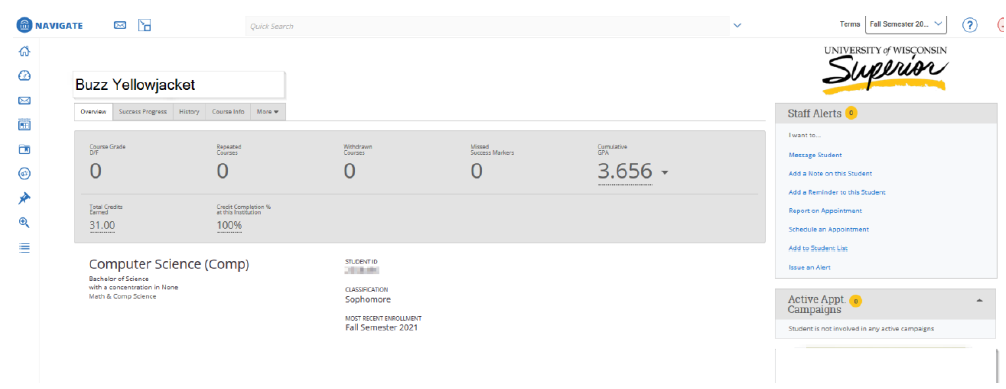
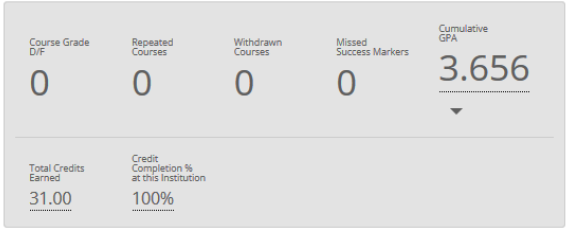
The top gray box, also known as the "30-Second Overview" or “gut check”, provides an overview of the student’s academic performance. From here we can see some critical information that may indicate whether the student has previously struggled, such as D/F/W grades, their GPA and the student’s class completion rate.
The "Tags" section can provide additional information about the student. Tags can be placed on a student’s profile to highlight relevant information, such as an expected graduation term.

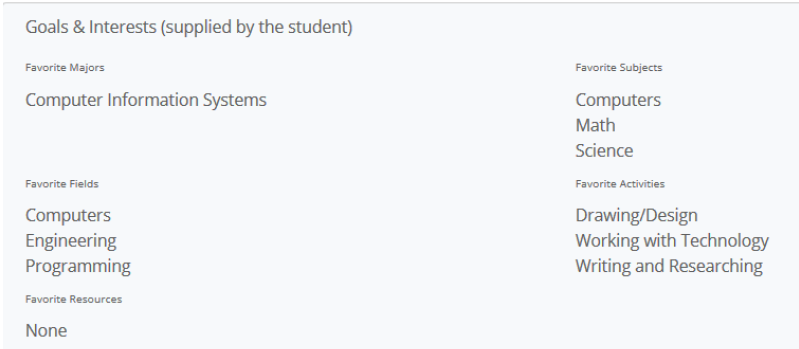
The Goals & Interests section includes items that the student has "favorited" within the mobile app (majors, fields, resources, subjects, and activities). If all fields say “None,” this indicates the student has not indicated favorite items in the mobile app.
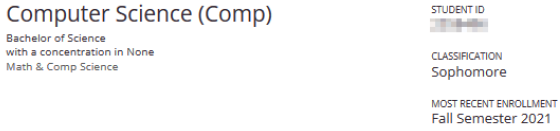
Basic information such as the student’s ID, classification year, most recent enrollment, and declared major are also listed on the Overview tab.
The "Categories" section is used to provide additional information about the student pulled from E-Hive. Some of this information can include any declared minors for the student, their academic program and whether they have any holds.
Success Progress
The success progress page provides more detailed information about the student. If the student’s academic program has any Success Markers set up, then you will be able to track the student’s progress towards completing them.

Also available is trend data for both GPA and credits completed by term. This information can be helpful in identifying any changes over time in a student’s academic performance. This information is displayed in both a bar graph and table format.
History
The history page is used to review documented interactions with the student. In the History section you will be able to review appointments, alerts, cases, notes, progress reports and check-ins with departments across campus. The history section is a great place for getting the detailed information about a student that makes their situation unique.
From the History section, if you wish to see more details on an interaction, click on the Expand/Collapse All drop down menu. You also have the ability to filter which documented interactions you wish to view by clicking on the Filter by Type drop down menu.

Course Info
Under the "Course" Info tab you can see what classes the student is enrolled in as well as midterm and final grades if they have been reported. You also have the option to send an email to the student’s instructors by selecting the checkbox next to the class and clicking on the Actions drop down menu.

Also included in the Course Info tab is a list of classes and high school information imported from E-Hive.
Calendar
Click the More drop down tab is the option to view the student’s Calendar. From here you can view the students class schedule. The student does have the option of syncing their calendar with Navigate to share additional information, though this is rare.

Appointments
The Appointments tab provides a list of the upcoming, recent, and no show appointments for the student. You will only be able to view appointments within Care Units for which you have the appropriate permissions. To access the Appointments tab of the Student Profile, click the More tab and select Appointments.

The "Upcoming Appointments" section will list all currently scheduled appointments with the student that you have permission to view. You can filter the list by Care Unit in the drop down in the upper left and choose to display canceled appointments by clicking the checkbox in the upper right. All appointments scheduled within the next 90 days will display, depending on user permissions to access that information. No actions can be taken on appointments in this section.
The "Recent Appointments" section will list all recently scheduled appointments with the student that you have permission to view, including canceled and no show appointments. You can filter the list by Care Unit in the drop down in the upper left. No actions can be taken on appointments this section.
If Summary Reports have been filed on the student appointments, you can click the green Details or No Show button in the right-hand column to view the full Summary Report.
The "No Show Appointments" section will list all scheduled appointments with the student that you have permission to view, in which the staff member marked the student as “No Show.” You can filter the list by Care Unit in the drop down in the upper left. The green banner at the top of this section displays the total number of no show appointments since a specific time and date.